
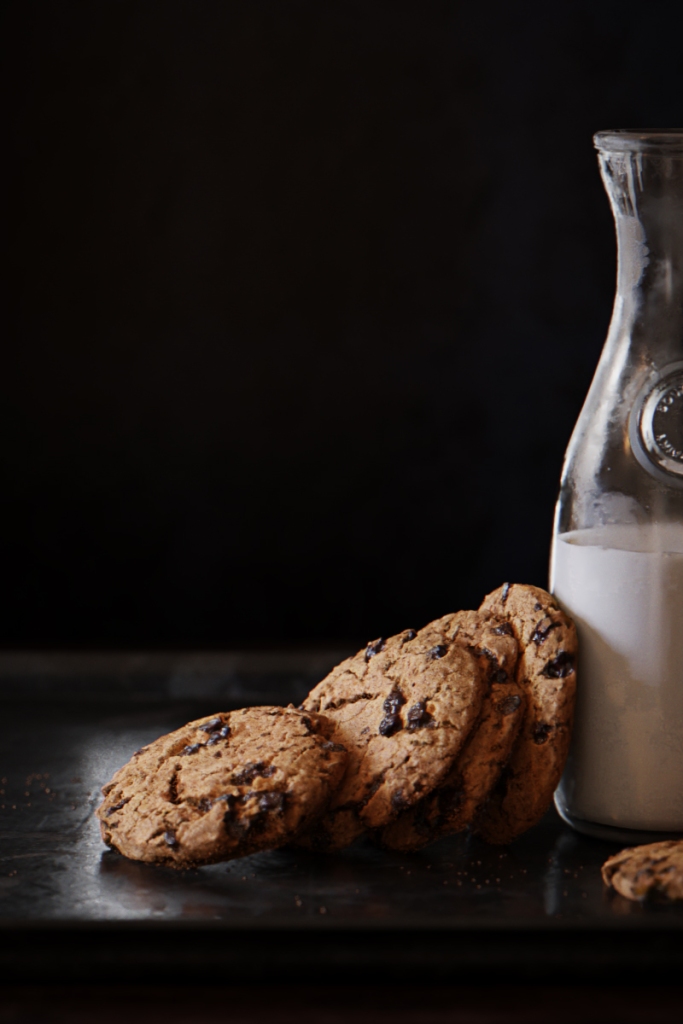
Salut à tous,
Petit post pour le fond d’écran que j’ai fais pour mon ordi.
Hi everyone,
Little post for the wallpaper I made for my computer.

Salut à tous,
Petit post pour le fond d’écran que j’ai fais pour mon ordi.
Hi everyone,
Little post for the wallpaper I made for my computer.
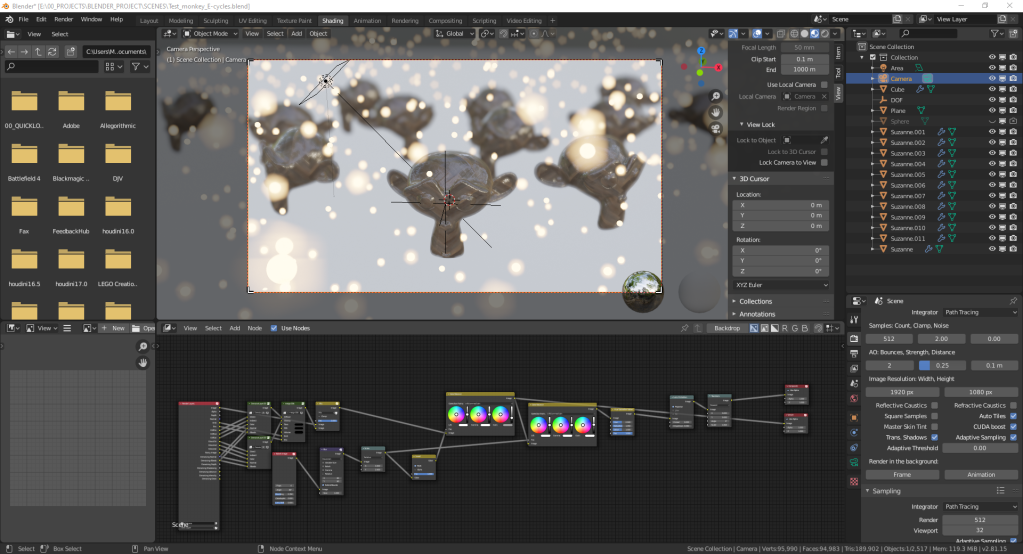
Bonjour à tous,
Je publie enfin mon travail sur l’intégration de mon robot Lego N°5. Le modeling a été fait sous Studio 2.0 (soft de modélisation Lego), le tracking sous Blender, ainsi que le rendu (E-Cycles) et le compositing.
Hello all,
I finally publish my work on the integration of my Lego robot N°5. The modeling was done under Studio 2.0 (Lego modeling software), the tracking under Blender, as well as the rendering (E-Cycles) and the compositing.
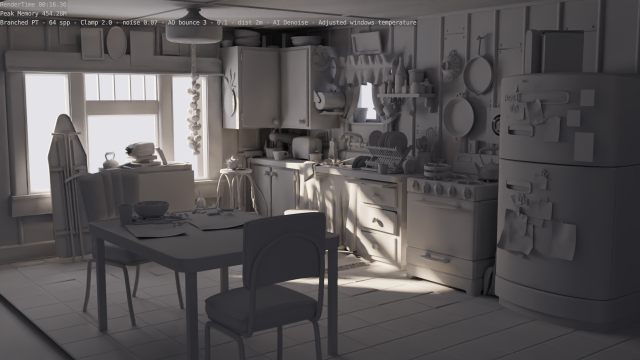
Bonjour à tous,
Dernièrement j’ai porté le tutorial Cookies & Milk de Renderman sous Blender avec E-Cycles. Donc, j’ai exporté la scène Maya en Alembic pour récupérer tout ça dans Blender. La modélisation et les textures sont de ce tutorial ici :
https://renderman.pixar.com/cookies-and-milk
https://rmanwiki.pixar.com/display/RFM23/Introduction+to+Best+Practices
Les shaders sont de moi vue que pas compatible avec Maya et surtout les shaders Pixar différent dans ce tutorial.
Au niveau performances, le rendu est de 3min32 environ, compos inclus. Pour avoir un meilleur contrôle, j’ai fais des layers pour isoler les lights (pas de lightgroup au moment de ce tuto), ce qui m’a fait donc 3x 3min32 environ, logique. Dans tout les cas, ça reste beaucoup plus rapide que Renderman même avec 3x le calcul. Sous Cycles, le calcul est beaucoup plus long et monte à 7min environ donc content de E-Cycles. Pour cette scène j’ai utilisé le branched path tracing car le raytracing me permettait pas d’avoir ce que je souhaitais en sampling dans le lait. Le branched path tracing sampling augmente un poil le temps de calcul.
Je mets à disposition la scène qui marche aussi avec Cycles de base mais ouvrez avec Blender 2.82 minimum. Tout est packeter dans la scène. Ci-dessous une vidéo en timelapse de mes 6h de travail en 51min. Donc pas de son dans la vidéo, longue mais pour ceux qui veulent voir comment j’ai travaillé et si ça peux aider, autant le mettre à disposition si vous vous posez des questions sur cette scène. Et oui, ma backlight m’a prit du temps, je voulais un truc précis.
A++
————————————————————————————————————
Hi all,
Lately I’ve been doing Renderman’s Cookies & Milk tutorial under Blender with E-Cycles. So, I exported the Maya scene in Alembic to get all this in Blender. The modeling and textures are from this tutorial here :
https://renderman.pixar.com/cookies-and-milk
https://rmanwiki.pixar.com/display/RFM23/Introduction+to+Best+Practices
The shaders are from me as not compatible with Maya and especially the Pixar shaders are different in this tutorial.
In terms of performance, the rendering is about 3min32, compos included. To have a better control, I made layers to isolate the lights (no lightgroup at the time of this tutorial), which made me 3x 3min32 about, logical. In any case, it’s still much faster than Renderman even with 3x the computation. Under Cycles, the computation is much longer and goes up to about 7min so I’m happy with E-Cycles. For this scene I used branched path tracing because raytracing didn’t allow me to get what I wanted in milk sampling. Branched path tracing sampling increases the computation time by a hair.
I provide the scenes that also works with basic Cycles but open with Blender 2.82 minimum. Everything is packaged in the scene. Below is a timelapse video of my 6h of work in 51min. So no sound in the video, long but for those who want to see how I worked and if it can help, you might as well make it available if you have any questions about this scene. And yes, my backlight took me some time, I wanted something specific.
A++
Matt
SCENE DATA : https://drive.google.com/file/d/1pxUNtv_4-QNur4HZbUjj3Jr0-M4RJrnR/view?usp=sharing
Salut encore,
Ouais, E-Cycles ça me plais lol !!! Un petit truc que j’ai bidouillé today.
En gros, j’ai voulu testé la box projection de Blender 2.81… puis je me suis dit, aller un petit rendu, aller un peu plus de Suzanna, aller des particules, aller du DOF, aller un peu de compos… résultat… un nouveau fond d’écran « artistique ».
Temps de rendu, 1 min 16 sec en 1920×1080 sur dual Geforce GTX 1070 Ti
Hi again,
Yeah, I like E-Cycles, lol!!!!! A little something I tweaked today.
Basically, I wanted to test the projection box of Blender 2.81… then I thought, go for a little rendering, go for more Suzanna, go for particles, go for DOF, go for a little compos… result… a new « artistic » wallpaper.
Rendering time, 1 min 16 sec in 1920×1080 on Dual Geforce GTX 1070 Ti

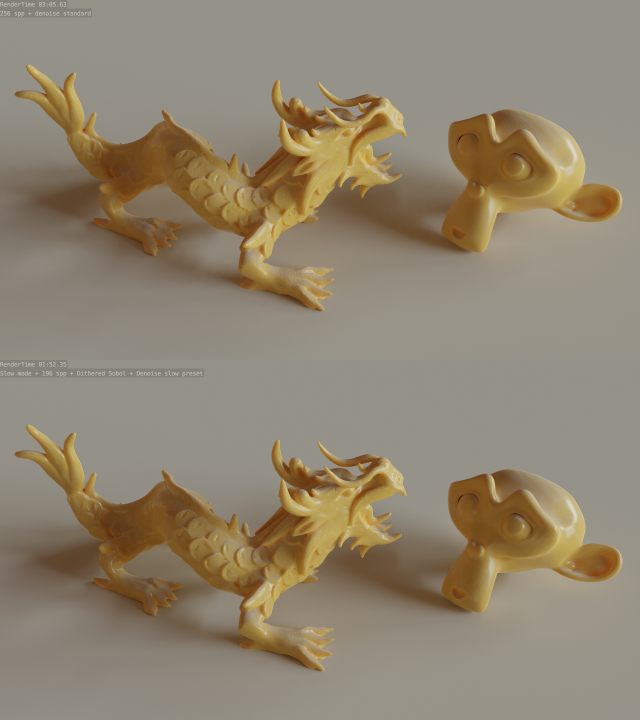
Salut à tous,
Je continue mes tests sur E-Cycles et franchement ça déboîte grave.
Dans ce test, j’ai essayé de faire un rendu avec 1 AO bounces en augmentant un peu le rebond à chaque fois pour voir l’impact de ce dernier sur le calcul. Dans tout les cas, ça reste super rapide sur mon matériel. Avec le AI denoise et en image fixe les temps de rendu peuvent être vraiment rapide.
Bon je samples quand même un peu plus que conseiller car je vois les léger artefact du au denoise dans mon rendu fixe lol !!! Vous trouverez ci-dessous les rendu en question + avec compos (information des rendu présente dans les images) ainsi qu’une vidéo d’une animation de la scène. Là j’ai poussé plus le sampling car :
Le temps de rendu en moyenne pour le rendu animé (2 séries d’image avec 2 seed different pour Altus + une série de frame pour le volume + denoise Altus + compo) est de 6 min 50 par frame.
J’ai du aussi augmenté le sampling et donc les temps de calcul car pas de texture et donc denoise moins facile. Images et vidéo ci-dessous
Hello everyone,
I’m continuing my tests on E-Cycles and frankly it’s fast.
In this test, I tried to render with 1 AO bounces by increasing the rebound a little each time to see the impact of the rebound on the calculation. Anyway, it’s still super fast on my equipment. With the Denoise AI and fixed image rendering times can be really fast.
Well I sample a little more than advising because I see the slight artefact due to the denoise in my rendering lol!!!! You will find below the renderings in question + with compos (information of the renderings present in the images) as well as a video of an animation of the scene. There I pushed more sampling because:
I also had to increase the sampling and therefore the calculation times because no texture and therefore denoise less easy. Images and video below


Salut,
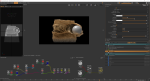
Voici un petit test sous E-Cycles, une version optimisé de Cycles de Blender !!! ça divise par deux un rendu test là et en plus, voir vidéo, le rendu est entre 10 et 16 sec par frame en 1280×720. La tache noire dans la vidéo sur un morceau du robot en Lego est lier au modèle (mon ancien modèle, le nouveau propre est refait sous Studio 2.0) pas à E-Cycles 🙂 . Note : cliquez sur l’image puis en bas à droite pour voir la taille réelle et voir les temps de calculs (divisé par 2)
Hi,
Here is a small test under E-Cycles, an optimized version of Blender Cycles !!!! it halves a test rendering there and in addition, see video, the rendering is between 10 and 16 sec per frame in 1280×720. The black spot in the video on a piece of the robot in Lego is linked to the model (my old model, the new clean is redone under Studio 2.0) not to E-Cycles 🙂 . Note : click on the picture and on see full screen on the below right to see the picture in full size and see the rendering times (divided by 2)
Enjoy !!!
Salut à tous,
Depuis peu, une build de Blender avec import et export alembic est disponible et bien sur première envie, tester des poils !!!
Donc, en pièce jointe, une vidéo et des screenshots du truc 🙂 J’ai un « poil » galéré avec le nouveau hair shader de Guerilla pour le prendre en main mais une fois prit en main, ça déboîte.
La dernière build de Blender permet d’exporter que les guides curves seulement, donc a tester aussi 😉
C’est vraiment chouet pour la production de pouvoir sortir des *.abc de Blender et les envoyer dans Guerilla, surtout en voyant le system de fur de Blender, entre autre !!!
Pour le temps de rendu, avec GI, entre 17min32 et 23min 55
Enjoy !!!
Hi everybody,
Recently a build of Blender with import and export alembic is available and of course first desire , test hair !!!
So attached , Video and screenshots of the scene 🙂 I have a « few » struggled with the new hair shader from Guerilla, but once took over , it’s awesome .
The latest build of Blender can export curves as guides only, so need to test too 😉 It really fun for productions to get out *.abc of Blender and send them to Guerilla , especially seeing as the fur system of Blender , among other !!!
For the rendering time, between 17min32 and 23min55
Enjoy !!!

Salut à tous,
Voici un petit test sur le nouveau système de dynamique de hair de Blender 2.74. Pour ma part, je trouve qu’il marche plutôt pas mal du tout, le temps de simulation pour 250 frames est d’environ 1min30 dans ce cas là, sur mon I7 860.
Pour le rendu, j’ai passé le tout dans le GPU, enfin, les deux. Les temps de calcul vont de 8min à 15min la frame, avec motion blur (1024 samples/pixel). Seul petit piège, le bake stoppe à la dernière frame, et du coups, avec motion blur, la dernière frame ne passait pas en GPU et en CPU prenait 8h… A vrai dire le coté semi transparent de l’image m’a guider, problème de sampling. Après avoir baker la frame 251, tout est redevenu normal. Oui, du hair semi-transparent, en sampling, mal. Du coups, le rendu de la dernière frame avec un bon bake de la dernière frame+1 pour le motion blur, le rendu fut de 15 min 21 sec. Sans motion blur, pas de problème avec la dernière frame.
En tout cas, c’est cool comme nouveau système de dynamique,
Enjoy !!!
Hi all,
Here’s a little test on the new dynamic hair system in Blender 2.74. Personally, I think it works not bad at all, the simulation time for 250 frames is about 1min30 in this case, on my I7 860.
For the rendering, I spent all within the GPU, exactly in the two. The computation time was 8min to 15min the frame, with motion blur (1024 samples/pixel). Only small trap, the bake stops at the last frame, with motion blur, the last frame is not fit in the GPU and CPU took 8 hours… Actually the semi-transparent image guided me to sampling problem. After I baked frame 251, everything is back to normal. Yes, the hair semi-transparent, in sampling, bad. Rendering the last frame with a good bake for the last frame + 1 for motion blur, the rendering was 15 min 21 sec. Without motion blur, no problem with the last frame.
Anyway, the new dynamic system is cool,
Enjoy !!!
Hi all,
I present to you the 3D logo I made for Tarantula Luxembourg. 2D design was made by Granduchy. I made this logo with great pleasure and I of course used Blender / Cycles. So from the beginning to the end of the project, only Blender was used (modeling / animation / rendering / compo). The shader used is the PBR_Shader, although here it is not operated within these limits ;). The rendering was done under Cycles GPU mode. Of course, Tarantula participates at LuxFilmFest. For more information, here is the festival’link : http://www.luxfilmfest.lu/
Tarantula Luxembourg website : http://www.tarantula.lu/
Granduchy website : http://www.granduchy.com/
Tarantula projects teaser with the logo at start : https://vimeo.com/120383914
Have Fun !!!
Salut à tous,
Je vous présente le logo 3D que j’ai fait pour Tarantula Luxembourg. Le design 2D a été fait par Granduchy. J’ai fais ce logo avec grand plaisir et j’ai bien sur utilisé Blender / Cycles. Donc du début à la fin du project, seul Blender a été utilisé (modeling / animation / rendering / compo). Le shader utilisé est bien sur le PBR_Shader, même si ici il n’est pas exploité dans ces limites 😉 . Le calcul a été fait sous Cycles en mode GPU. Bien sur, Tarantula participe au LuxFilmFest. Pour plus amples informations, voici le lien du festival : http://www.luxfilmfest.lu/
le site de Tarantula Luxembourg : http://www.tarantula.lu/
Le site de Granduchy : http://www.granduchy.com/
La vidéo de présentation de Tarantula avec le logo 3D au début : https://vimeo.com/120383914
Have Fun !!!
Behind the scene :


Hi all,
There is a long time ago in galaxy far far away, I proposed to make a video to use the Octane Render plugins for exporting datas to Guerilla Render… So yes, certainly, I zapped through profit wakeup call and time available… here is the famous video for exporting datas from Blender to Guerilla render. This video can help you to export also alembic for Octane Render (yes the workflow is odd, also for Octane Render standalone).
Hope this video will help,
ps : yes, I have avoided making you suffer with my southern accent…
Have fun !!!
Salut à tous,
Il y a fort longtemps dans une galaxie très éloignée, j’avais proposé de faire une vidéo pour utiliser le plugins d’Octane Render pour exporter des datas vers Guerilla Render… Alors oui, certes, j’avais zappé mais grâce à une piqûre de rappel et du temps à dispo… voici donc la fameuse vidéo pour exporter des datas de Blender vers Guerilla Render. Cette vidéo peux aussi vous aider à exporter de l’alembic pour Octane Render (oui le workflow est bizarre, aussi pour Octane Render standalone).
En espérant que cette vidéo vous aides,
ps : oui, j’ai évité de vous faire subir mon accent du sud…
Have fun !!!
